INSTALLING & SETTING UP
Step 1: Download
Depending on your operating system, download one of the above-mentioned versions of Blender.
I personally use Blender 2.76 since it is the most recent version that is still compatible with Sims4Studio.
Step 2: Installing
a.) Launch the installer you downloaded in Step 1.
b.) Follow the on-screen instructions and install the program.
by default it will install to:
C:\Program Files\Blender Foundation\Blender\
If you want it to install in another location you can do so at this time.
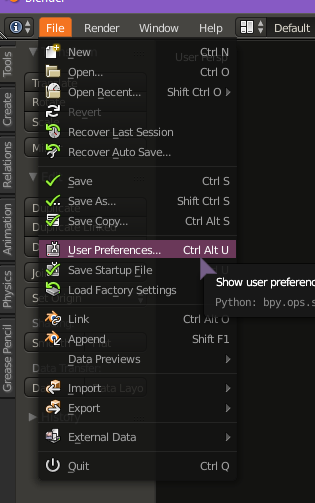
Step 3: Blender Preferences
a.) Open Blender from where you just installed it.
b.) Go to “File” > “User Preferences” or use the hotkey CTRL+ALT+U
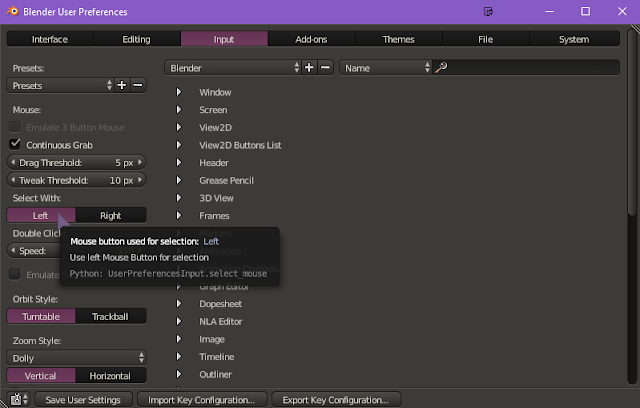
c.) Under the “Input” tab, change “Select With:” to “Left”.
(as pictured below)
Sims4Stuido is also select with left.
So for me, it is a little less confusing this way.
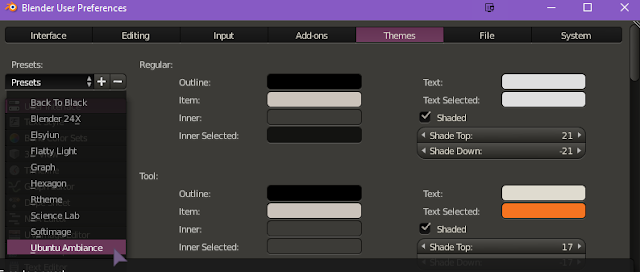
d.) Under the “Themes” tab, click on the “Presets:” dropdown window and select “Ubuntu Ambiance”.
(as pictured below)
This is a dark theme with bright purples and orange on black.
To me, it is a lot easier to see what I am doing with this color scheme for Blender.
If you want to try other presets you can this theme is just a recommendation.
e.) Once done click “Save User Settings” in the bottom left-hand corner.
(as pictured below)