How to create a Pose Pack for Pose Player

About This Tutorial

In this tutorial, I will be teaching you how to create your very own ‘Pose Pack’ poses for in-game use.
Thanks to the amazing Andrew over at Sims 4 Studio we can now create non-default poses for the game.

What are non-default poses?

Non-default means that they will not override any other animations in the game.
Like the poses before ‘Pose Player’, would override animations such as push-ups.

If you have any questions, feel free to ask and I will do my best to assist you. Contact me on Discord for help!

So, let’s get started!

Needed Programs

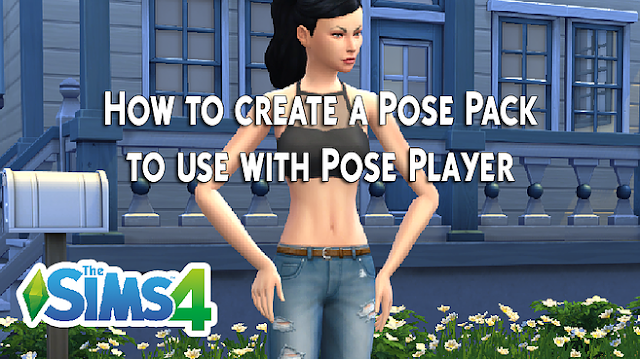
For this tutorial, we will be creating a ‘Pose Pack’ that we can use in-game. (Not CAS poses)

The first thing we need to do is ‘Open Sims 4 Studio’.
On the bottom right of the screen type in your ‘Creator Name’ if you have not already.

1. On the top left you will see ‘Animation’, under that you will see two options ‘Clip Pack’ and ‘Override’.
For this tutorial, we will ‘Select Clip Pack‘, after you have that box checked ‘Click Animation’.

 2. A pop-up window will open asking you to save your new .package.

Name it and save it to your ‘Mods’ folder.
Mods folder location: Documents > Electronic Arts > The Sims 4 > Mods

3. Now you will see a new window with 3 tabs.

The first tab is ‘Pose Pack’ this is where you will name your pose pack, give it a brief description, and add an icon.

The icon you will be adding on this tab will be the one you see first,

I usually make this icon have a title or an image of one of the poses for preview.
The best size for the icon is 64×64, make sure you save it in DDS format.

 1. Next we need to click the ‘Clips Tab’. You will see your original icon from the ‘Pose Pack tab’, don’t worry we will be changing this later.

2. First thing we need to do is export the rig we want to use.

For this tutorial, I will be doing Adult Female.
Make sure you have ‘Clip.blend’ selected, and next to the word rig click export.
I recommend naming your clip as ‘Clip One’ and saving it to your desktop. 

(This will generate a .blend file)

What is the difference between clip.blend and EA Clip?
Clip.blend – is a empty rig, this means there is no poses or animations assigned to the “model/rig”.
EA Clip – is a pose or animation already created in the game that you can export to edit.

 3. Now go to your desktop and open up the .blend file that you exported.
Once it is open and you are in Blender you will see a standing female rig like pictured below.
There will be tiny black dots all over the model, these are the joints that you can move to create your pose.

To rotate the model hold in mouse wheel.
To rotate the entire screen hold shift + hold in mouse wheel.
To zoom in and out scroll the mouse wheel.

 
4. Select the joint (black dot) you want to move first by ‘Right Click’ then press R to rotate.
(You will see a black arrow)
You can also press R twice to rotate freely.
(You will see a red and green arrow)
 
5. You can move all the joints until you have the pose you desire. 
 
1. Now that we have our pose, ‘Click A’ on your keyboard.
This will turn all of the joints blue.
Then ‘Click I’ on your keyboard, a menu will pop up.
‘Select LocRot’, this will lock our rotation for the pose.
2. Now that we have locked our rotation we need to set the time on our pose.
On the bottom of the screen, you will see ‘Start and End’, we want to change our end number to 80 (or higher).
This will create a green line on the “timeline”.
Move it toward the end, don’t put it all the way at the end anywhere between 75-79 is alright.

3. Once you are done, you can ‘Save’ your pose.
File > Save as (you can save it as a new file or override the ‘Clip One’ file.)

4. Now that we have our pose saved, we need to go back to Sims 4 Studio.
‘Import’ your pose, give it a Name and Description.

You can also give it an icon, by importing a new icon on the left.
(Or you can just hit save and go in-game to get a screenshot to make an icon as I did.)

If you want to add more poses to your pack, ‘Click Add’ in the top right corner.

This will create a new “Clip”, and you can repeat the process to create more poses.

5. Once you have your info set for your pose(s), ‘Click Save’ in the bottom right-hand corner of Sims4Studio.
Now your pose is finished!

Now you can go in-game and check out your pose!

How to Use Pose Player:

To use the pose player once you are in-game, ‘Click your Sim’ and you will see “Pose by Pack”.
Click that then you will have a new window, scroll through that window until you see your pack.
‘Click your Pack’ then you will see a list of all the poses in your pack.
To play a pose simply click on the one you want your sim to perform.
Once you are done with the pose you can either click off the pose in the interactions queue on the left of the screen or select your sim again and ‘Click Stop Posing’. 

Subscribe

Just subscribe to my newsletter
to receive all fresh posts